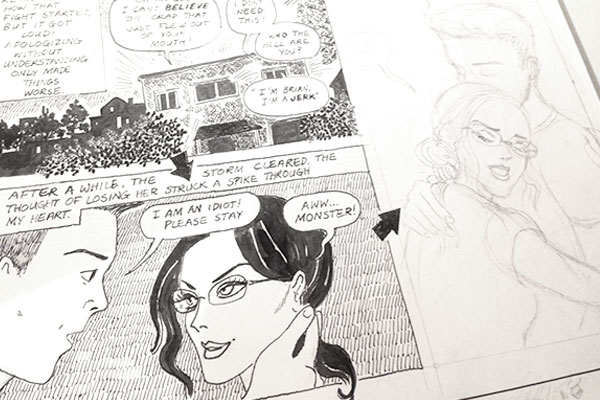
Studio
Assignment list, compartive presentation of "how do I tell this story?" techniques, state-of-the-art production methods, a collection of templates and external resources.
Assignments
All assignments are due at the beginning of class on the designated date, unless otherwise noted. Late assignments and make-up work will be accepted up to one week after the due date for half credit. Assignments may not be submitted electronically, except by prior arrangement with the instructor. All writing assignments must be typed.
Getting to Know You
This is your first assignment, due within 48 hours of our first session. Send email to dsm@artofthecomicbook.com with a "CLASS - SEMESTER YEAR: YOUR NAME" subject line format (example: Creating a Comic Book (LALW415-01) SP 2022: Alex Toth), please answer the following:
- What do you hope to get out of this class?
- What is your experience with comics? Please include examples or websites if you've made or written about them.
- Is your primary interest creating, teaching, or analyzing comics?
- What is your major and/or career?
- How did you hear about this class?
- What type of stories are you most interested in telling?
- What comics do you enjoy reading?
- Who are your favorite creators?
- Are you involved in any comics-related groups or activities?
- Anything else about yourself that you want
Artist Presentation
Share examples of comic book art, processes, or influences you cited Getting to Know You:
- Make a five-minute presentation of a comic, graphic novel, creator, or process
- Show examples of how this work resonates with you
- Tell us how this example will affect your work
- If applicable, say something about this example that you don't like
Slice of Life
Three pages of comics continuity (minimum). Write and draw a story of a personal event, either directly experienced or witnessed. Focus on personal details unique to you. Consider not being the protagonist.
- Phase 1: Story development
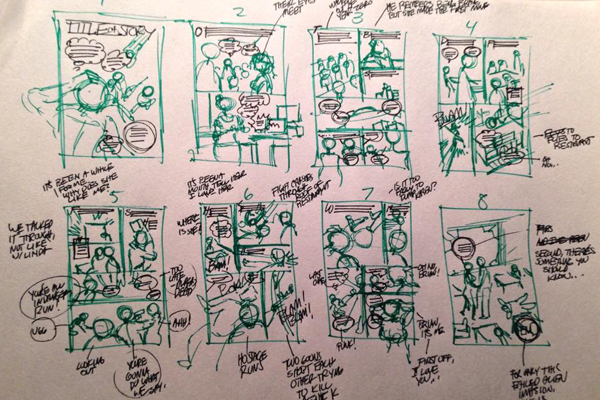
- Phase 2: Visual research, script, and thumbnails
- Phase 3: Pencil art and lettering (Ames 3.5)
- Phase 4: Inking
- Phase 5: Sign-off
Folk Tale
Three pages of comics continuity (minimum). Write a full script in Microsoft Word. Do whatever it takes to make it your own (alternative time periods, personal details, experimental techniques, a "lost ending" approach, etc.) Provide research, setting + character notes.
Minimum requirements
- Original art size 10.5" x 16"
- Dialog/caption lettering Ames 3.5 at two-thirds scale
- Minimum three pages of comics continuity (you can do more if you like)
- Minimum average of four dialog/caption balloons per page
Script
Write a full script in Microsoft Word. Do whatever it takes to make it your own (alternative time periods, personal details, experimental techniques, a "lost ending" approach, etc.) Provide research, setting + character notes.
- Phase 1: First draft
- Phase 2: Second draft
- Phase 3: Sign-off
Art
Beginning with thumbnails, tightly follow the approved script while allowing room for improvisation. Expect at least two rounds of editorial feedback. Letter and ink to completion.
- Phase 1: Thumbnails
- Phase 2: Pencil art and lettering
- Phase 3: Inking and lettering
- Phase 4: Sign-off
Coda
Three pages of comics continuity (minimum). Final assignment intended to show everything you've learned. Subject matter is entirely up to you: romantic, historical or political, personal or objective, a comedy or drama, for kids and/or for adults. Think of this as part of an anthology where I'm editor, art director and production manager. My primary purpose is editing for clarity and consistency; my secondary purpose your sounding board for ideas.
Pitch meeting
One-on-on 15-minute Zoom breakout room with me to pitch your idea. Bring any supporting documents (character drawings, visual ideas, reference material, etc.). With editorial approval, you should be able to start working on a first draft script.
Script
Based on feedback from the pitch meeting, plot and write a first draft script. Don't nail everything down since there'll be at least one round of revisions.
- Phase 1: First draft
- Phase 2: Second draft
- Phase 3: Sign-off
Art
Beginning with thumbnails, draw and letter three pages of comic book continuity. Tightly follow the approved script while improvising for visual media. Use everything you've learned from comic book art history, dramatic use of camera angles, pacing, observation, and wit. Expect at least two rounds of editorial feedback. Letter and ink to completion.
- Phase 1: Thumbnails
- Phase 2: Pencil art and lettering
- Phase 3: Ink art and lettering
- Phase 4: Sign-off
Quick Comic
Create ten pages of comics continuity (minimum) without professional art supplies. Typing paper, sketchbooks, ball point pen, whatever you've got right now! Base final art to print 6 x 9 inches (2:3 ratio). Topic, genre and setting are entirely up to you.
- Minimum art dimensions 7.5 x 10 inches
- Art and lettering need to be legible to the average viewer
- Focus on character development, setting, mood, and story arc
- If needed, use "Genre, Line, Character, Prop" as a prompt
Zip's Last Day
Three pages of comics continuity from a full script. Follow the script as tightly and creatively as possible.
- Phase 1: Visual research and thumbnails
- Phase 2: Pencil art and lettering (Ames 3.5)
- Phase 3: Inking
- Phase 4: Sign-off
Genre, Line, Character, Prop
Three pages of comics continuity (minimum) combining a genre with a required line, character, and prop. Partially inspired by the 48 Hour Film Project.
Parameters for this semester
- Genre: Horror Comedy
- Line: "Mom, the house is on fire."
- Character: Knuckles McPherson: Professional Isolationist
- Prop: Stat camera
Phases of development
- Phase 1: Visual research and thumbnails
- Phase 2: Pencil art and lettering (Ames 3.5)
- Phase 3: Inking
- Phase 4: Sign-off
Marvel Method
Three pages of comics continuity. Collaborative assignment based on the Marvel Comics assembly line process.
Story Conference
Writers and artists team up to plot a new story. Each student will be the writer of one story and artist of another (if time allows, students will write, pencil, letter, and ink different stories). Students are paired as writer/artist teams for 20-minute brainstorming sessions to plot a story of any tone or genre. Don't worry about dialog, focus on visual elements. The artist should walk away with a brief synopsis of what to draw. At the end of the first session, students will be reassigned and paired with a different student. Writers become artists and vise versa. This new paring meets for their own 20-minute brainstorming session. Every student will be the artist of a story at the phase.
- Phase 1: Team A Brainstorm
- Phase 2: Team B Brainstorm
- Phase 3: Homework - Everyone pencils all three pages loosely
Pencil Art
Thumbnail story from story conference notes. Take over the story, improvise and elaborate on whatever your writer didn't cover. Gather any additional photo and historical reference if needed. Focus on visual drama and storytelling. Anyone should be able to tell what's going on without the words. Leave room for writer to place word balloons and text. Use thumbnails as basis for making loose pencil art on full size paper, with just enough detail to distinguish characters and backgrounds (body language, facial expressions, furniture, etc.).
- Thumbnail, pencil
- Send pencils to writer
Script
Send your artist a letterer's script with indications of where the words should go. No lavish panel descriptions, just dialog, captions, and onomatopoeia for sound effects. Ingest the wordless art when seeing it for the first time, especially if the they improvised from what you agreed on in the story conference. Write dialog and captions in the form of a panel-by-panel letterer's script. Don't bother with descriptions, just the words. Label each balloon or caption with a number within each panel. Draw indications of where you want the words on copies of the art (scans if it's digital, over tracing paper on analog), using the corresponding numbers from your letterer's script. If this is a four-person team, send your letterer's script and marked-up art to your letterer. For two-person teams, send those assets back to your artist.
- Write letterer's script
- Mark up copies of art with lettering indications
- Two-person team: send letterer's script and marked-up art to artist
- Four-person team: send letterer's script and marked-up art to letterer
Lettering
Upon receving letterer's script and marked-up art, proceed to letter and border the final art in ink. Use the Ames 3.5 two-thirds setting for default dialog and captions. Improvise and embellish the more expressive lettering (titles, credits, sound effects, shout balloons, etc.). If this is a four-person team, send your lettered art to your assigned inker. For two-person teams, finish inking the art, scan and format to the Photoshop production file, create page TIFs of final art.
- Letter and border in ink
-
Two-person team:
- finish inking the art, finish Photoshop production
- create page TIFs of final art
-
Four-person team:
- send lettered art to your assigned inker
Inking
Working from the lettered and bordered pages, feel free to interpret and enhance the pencilled art with your personal inking style. Scan and format to the Photoshop production file, create page TIFs of final art.
- Ink the art
- finish Photoshop production
- create page TIFs of final art
Production
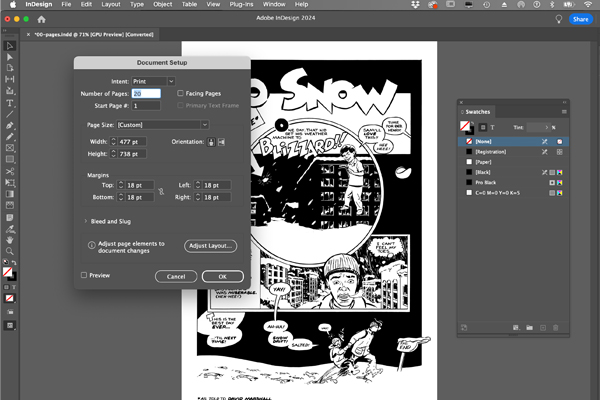
While your work is traditional ink-on-paper, print media is exclusively produced with digital tools. Photoshop has been the industry-standard tool to this end for more than 20 years.
Make Raw Scans
To get each page done in one pass, you'll need a tabloid flatbed scanner. Resolution paramaters:
- 400 ppi
- 100%
- Grayscale
Save each scan as a TIF with the naming convention of STORYNAME-PAGENUMBER.tif (example "sliceoflife-01.tif")
Budget approximately five minutes to scan each page. For instance, scanning 20 pages takes me 90 minutes.
Save your scans on the cloud or portable USB hard drive.
Photoshop Retouching
- Open your scan in Photoshop
- Trim and rotate as needed
- Retouch with "Image/Adjustments/Levels"
- Save in Photoshop as STORYNAME-PAGENUMBER.psd (example "sliceoflife-01.psd")
Photoshop Production
- Download the Photoshop production template!
- Instructional video on using this template
- Scale retouched page down to 60% (classic) or 66.25% (modern) at 400 ppi
- Copy/paste and position scaled page art into Photoshop template
- Generate a TIF for each page, Save each as YOURNAME-STORYNAME-PAGENUMBER.tif (example "davidmarshall-sliceoflife-01.tif")
Storytelling Process
Whether you're collaborating or working on your own, there's no one "correct" way of creating and developing a story. Here are just a few I've picked up over the years.
Full Script
Full scripts are organized by page with panel descriptions and "camera" angles. The writer is completely responsible for dialog, captions, SFX onomatopoeia, and story pacing.
- Some writers begin with thumbnail sketches before typing anything. "Chicken scratch" drawings can help visualize "camera" angles, left-to-right speaking order, space for word balloons, and the like. These thumbnails are only tools for writing a script, and should never be given to the artist.
- Writing just panel descriptions and dialog -- without page numbers and panel indications -- is an alternative approach that lets the artist pace the story.
Page Builder
Create each page one at a time in one uninterrupted session, without an outline, script, layout, page count, or overall plan in mind.
Larry Hama Method
Workflow pioneered by Larry Hama when writing and drawing on GI Joe.
- Create live-size original art of your entire story, each page with a different layout regardless of content (essentially pages of blank panels).
- Circle back to fit your story into these arbitrarily-designed pages.
Harvey Kurtzman Method
Workflow pioneered by Harvey Kurtzman when working for EC Cokics.
- Writer provides final script, thumbnails with lettering indications, and all reference.
- Letterer formats orignal art with lettering and panel borders.
- Artist illustrates on pre-formatted art boards.
EC Method
Similar to the Harvey Kurtzman method, except the artist is involved with the thumbnail process. Pioneered by Al Feldstein when working for EC Comics.
- Writer sends tight plot to artist.
- Artist breaks down plot into pages and panels.
- Writer creates full script based on artist breakdown.
- Letterer formats orignal art with lettering and panel borders.
- Artist illustrates on pre-formatted art boards.
The Post-It Method
Create panels in isolation, organize them into groups for pages, which you'll eventually organize into a multi-page comic book story.
Create panels on individual Post-It sheets
Content can be art (static or sequences), words (notes, descriptions, dialog) or any combination thereof. Don't worry the number of panels. You should be creating moments freely, without getting distracted by visual expression (camera angles, lettering placement, page design, etc.). You could have 10 or 100 panels, maybe more.
Organize panels into groups of pages
Don't worry about visual design yet. Five or six panels per page is a good starting point, but don't stick to that for every page. Some might have only one or two panels, others might need nine or 12...maybe more! Let the events of your story breath. Feel free to to recorder panels for dramatic effect! Adjust for page count if needed.
Design your pages
Create thumbnails based on the Post-It phase. This is when you figure out page layout, camera angles, and lettering placement. The size and position will be a guide for what to write.
Write a full script
Use thumbnails as a guide for page groupings (and panel descriptions if you're the writer). Get specific with dialog, captions, and SFX onomatopoeia.
Marvel Method
Three pages of comics continuity. Collaborative assignment based on the Marvel Comics assembly line process. Writer and artist create a plot synopsis, from which the artist pencils the entire story without words. Writer then adds copy to the pencil art.
Story Conference
Writers and artists team up to plot a new story. Each student will be the writer of one story and artist of another (if time allows, students will write, pencil, letter, and ink different stories). Students are paired as writer/artist teams for 20-minute brainstorming sessions to create a plot synopsis. Don't worry about dialog, focus on visual elements. The artist should walk away knowing what to draw. At the end of the first session, students will be reassigned and paired with a different student. Writers become artists and vise versa. This new paring meets for their own 20-minute brainstorming session. Every student will be the artist of a story at the phase.
- Phase 1: Team A Brainstorm
- Phase 2: Team B Brainstorm
- Phase 3: Everyone: loosely pencil all three pages
Pencil Art
Artists pencil the story on full size paper. Take over the story, improvise and elaborate on whatever isn't covered in the plot synopsis. Gather any additional reference if needed. Focus on visual drama and storytelling. Anyone should be able to tell what's going on without the words. Leave room for writer to place word balloons and text.
- Phase 1: Thumbnail, pencil
- Phase 2: Send pencils to writer
Script
Writers should study the art when seeing it for the first time, especially if the artist improvised from the plot synopsis. Send artist a letterer's script with indications of where the words should go. No lavish panel descriptions, just dialog, captions, and onomatopoeia for sound effects. Write dialog and captions in the form of a panel-by-panel letterer's script. Don't bother with descriptions, just the words. Label each balloon or caption with a number within each panel. Draw indications of where you want the words on copies of the art (scans if it's digital, over tracing paper on analog), using the corresponding numbers from your letterer's script. If this is a four-person team, send your letterer's script and marked-up art to your letterer. For two-person teams, send those assets back to your artist.
- Write letterer's script
- Mark up copies of art with lettering indications
- Two-person team: send letterer's script and marked-up art to artist
- Four-person team: send letterer's script and marked-up art to letterer
Lettering
Upon receving letterer's script and marked-up art, proceed to letter and border the final art in ink. Use the Ames 3.5 two-thirds setting for default dialog and captions. Improvise and embellish the more expressive lettering (titles, credits, sound effects, shout balloons, etc.). If this is a four-person team, send your lettered art to your assigned inker. For two-person teams, finish inking the art, scan and format to the Photoshop production file, create page TIFs of final art.
- Letter and border in ink
-
Two-person team:
- finish inking the art, finish Photoshop production
- create page TIFs of final art
-
Four-person team:
- send lettered art to your assigned inker
Inking
Working from the lettered and bordered pages, feel free to interpret and enhance the pencilled art with your personal inking style. Scan and format to the Photoshop production file, create page TIFs of final art.
- Ink the art
- finish Photoshop production
- create page TIFs of final art
Art Supplies
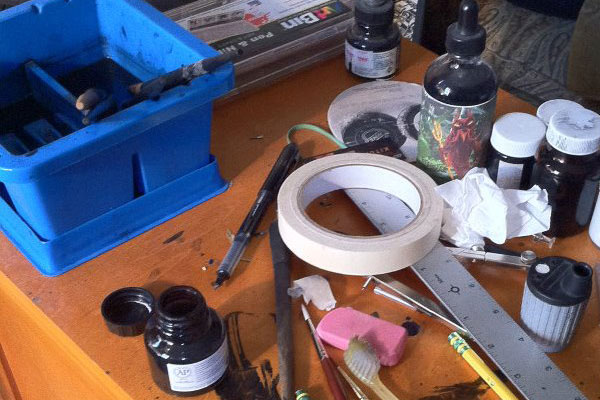
Drawing Tools
- Waterproof India Ink (drawing, pick one)
- Calligraphy Ink (lettering)
- Brushes: Short-handle round 2, 3 and 5
- White Out: Daler-Rowney Pro White
-
Pen Nibs
- Calligraphy Nibs: Speedball/Hunt 107 for thin and italic lettering, and Speedball B6 for bold lettering. Feel free to experiment with other nibs for bolder effects.
- Drawing Nibs: Speedball 512 or 513, 22B Extra Fine, 56 School, 99 Drawing, 101 Imperial
-
Pen Holders
- Crow quill pen holders (for Hunt 107 nibs): SF13 German gold metal crow quill pen holder ($9), Speedball crow quill pen holder ($2)
- Standard pen holders: Koh-I-Noor cork grip wooden pen holder ($7), Tachikawa comic pen nib holder ($7), Speedball standard pen holder ($2), Gullor set of 5 nib holders ($15)
- Ruling Pen
- Pencils (soft and hard)
- Erasers (gum, kneaded, pink pearl)
- Brush Basin
- Rags
Drawing Papers
- Bristol Paper Pads:
- 14 x 17 inches (art)
- 9 x 12 inches (practice, corrections)
- Strathmore is my recommended brand. Series 300 is the most affordable, Series 500 is higher quality
- Sketchbook (9" x 12")
- Tracing Paper (9" x 12")
- Letter Size Paper (8.5" x 11")
Drawing Surfaces
Technical Tools
- X-Acto Knife
- X-Acto Blades
- T-Square 24"
- Triangles (45/90-degree and 30/60-degree)
- Ames Lettering Guide | Demo
- Masking Tape
- Glue Stick
Required Computer Supplies
- Access to Tabloid Scanner
- Adobe Photoshop or similar (scan editing)
- Microsoft Word or similar (script writing)
- Adobe Acrobat Pro or similar (make PDFs)
Optional Supplies
Helpers
Production template
Photoshop production template of a mainstream American standard comic book, accounting for bleed, trim, and live area. Essential for formatting final art.
Comics presentation
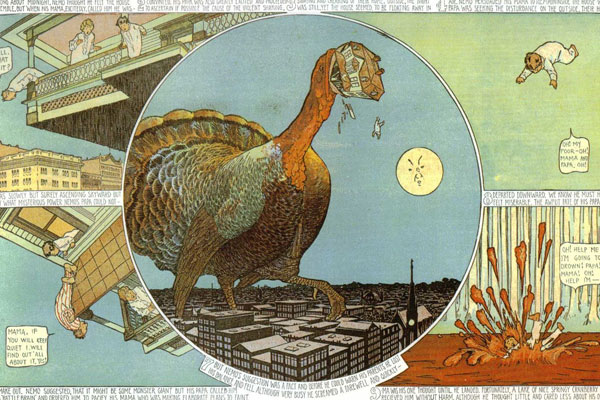
An all-too-brief Powerpoint on comics art history, and its relation to technology and commerce
Art of the Comic Book media demos
Step-by-step original video demonstrations of ink and drafting tool related to comics, filmed in my classic "one shot, one take" style. Also included are media techniques and interviews from legendary artists, including John Buscema, Moebius, Trina Robbins, and more!
Recommended Reading
Technique
- Making Comics: Storytelling Secrets of Comics, Manga and Graphic Novels by Scott McCloud
- Drawing Words and Writing Pictures: Making Comics: Manga, Graphic Novels, and Beyond by Jessica Abel and Matt Madden
- Writers on Comics Scriptwriting, Vol. 1 by Mark Salisbury
- Will Eisner's Shop Talk by Will Eisner
- "Thought Balloons and Other Abandoned Storytelling Techniques" Roundtable discussion moderated by Richard Starkings of Comicraft, with Todd Klein, Steven Grant, Trina Robbins, and more.
History
- Men of Tomorrow: Geeks, Gangsters and the Birth of the Comic Book by Gerard Jones
- Kirby: King of Comics by Mark Evanier
- Strange and Stranger: The World of Steve Ditko by Blake Bell
- Wally's World: The Brilliant Life and Tragic Death of Wally Wood by Steve Starger and J. David Spurlock
- Blazing Combat by Archie Goodwin
- The Comics Before 1945 by Brian Walker